Intermediate Microsoft Word for Writers
From working with critique partners, I’ve learned that many writers aren’t comfortable using some of Word’s handiest features. It’s a shame, because Word can save hours of time in the drafting process. I want to share some of the tips I’ve learned as a publishing assistant and through my own projects.
I use Microsoft Word 365 on Windows for all of my drafting needs. I do have Scrivener, but I only use it for outlining and keeping scraps of research. I like having things all in one place and being able to set my formatting just so.
I have the latest version of Word, so some of the instructions may differ slightly in your version. I’ll post instructions for the following tips on Word for Mac as well, but I can’t do screenshots. This won’t be perfect, so please comment if you have trouble implementing any of these tips. I’m happy to help!
Why Word?
LibreOffice, Open Office, Pages, and Google Docs work fine for most people, but using them as a professional writer puts you at a disadvantage. If you already have or can afford Word, it’s definitely worth the time to learn to use it to its fullest potential.
Word has an unrivaled spelling and grammar check. It saves me hours of time revising by automatically correcting misspelled words and missed commas. Checking for this stuff later feels like scraping my eyes against a chalkboard, so it really helps to get some of this done as I go.
Word also has an excellent search and replace function, which can save a ton of time during the revision process. Need to change a character’s name throughout the document? No problem! Do you tend to use more than one space in row? (I know I do). This problem is fixed in a flash.
Some writers complain that Word is distracting, and they like the clean, blank slate of a Scrivener document. I know that the red squiggly lines in Word can be distracting. But if you add words and names that are unique to your story to Word’s dictionary, it really should be highlighting only genuine mistakes.
Also. . .
OneDrive Exists
This is a big one for me, but since it’s a relatively new feature, not all Word users seem to know about it. It comes with all Office 365 subscriptions.
OneDrive automatically uploads your files to the cloud. There is also a web browser version of Word you can edit documents in. This is a big deal for two reasons:
If your computer dies, your files are still safe.
Just like with Google docs, you can edit your files from anywhere.
You get a TERABYTE of storage which should be enough to store the files of even the most prolific writers.
On to the tips. . .
Customize and Turn Spell Check Off and On
Since you can turn spellcheck off, there’s no reason to call Word distracting. You can also set it to not check for rules you don’t care about. For example, checking for prepositions at the end of sentences is something I won’t stand for.
File tab/ Options/ Proofing. You’ll get a menu with an array of options.
On Mac: Preferences/ Spelling & Grammar
Add Words to Your Dictionary
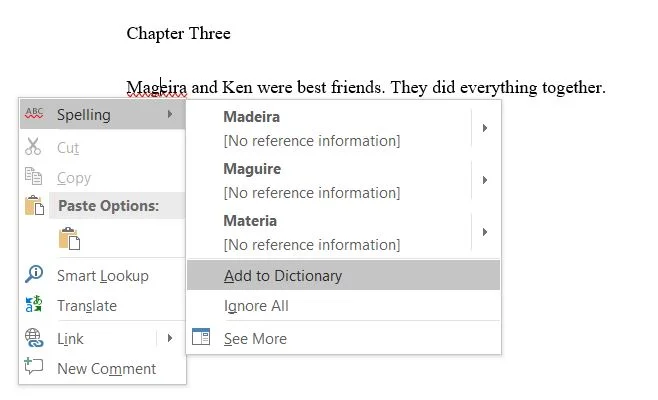
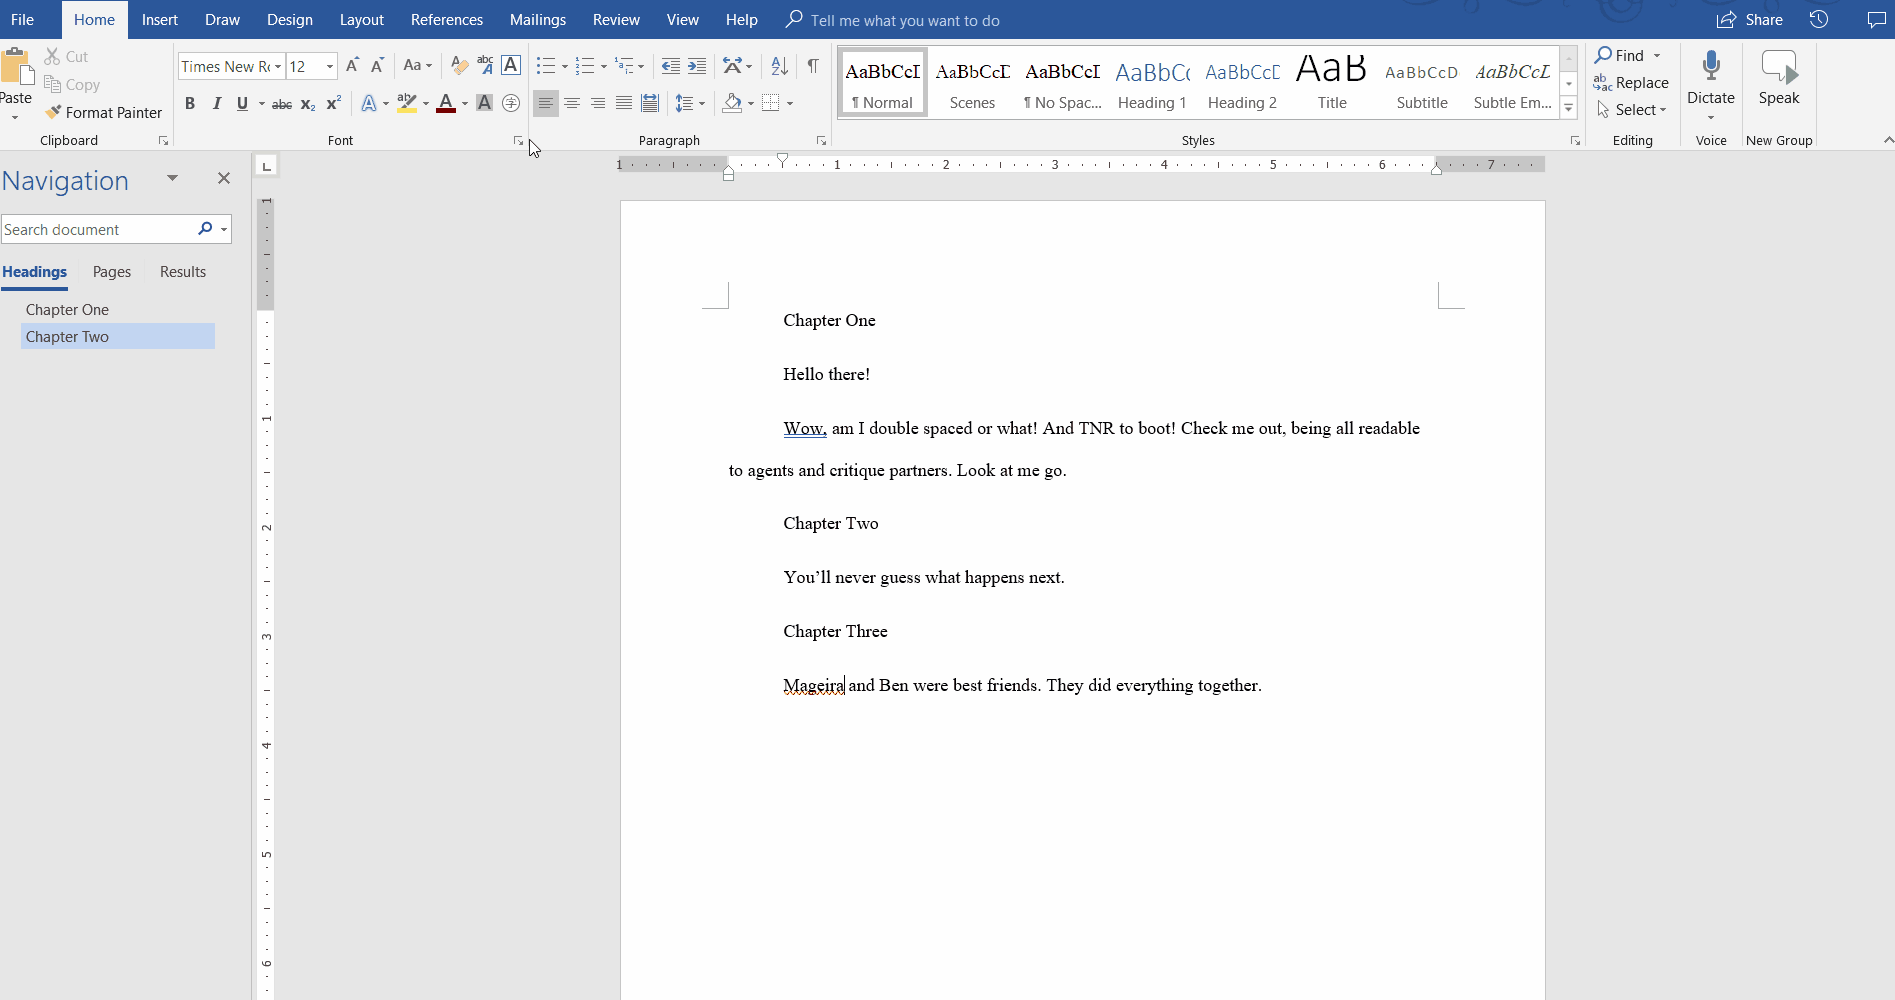
Let’s say you have a fantasy character named Mageira. It’s a cool name, but whenever you type it you get the red squiggly line of doom. Just right click the name in question, and under Spelling click “add to dictionary.” You’ll want to do this with the possessive form as well (“Mageira’s”).
On Mac: It’s a little more complicated. You have to create a custom dictionary and then add words to the dictionary manually. Follow the tutorial here.
This nifty feature is what allows me to type in Word without constantly being distracted by words that I know are correct.
Search and Replace

Search and Replace is your very best friend. On the Home tab, click the Find carrot and select “Advanced Find.”
Mac: Edit/ Find/ Advanced Find & Replace
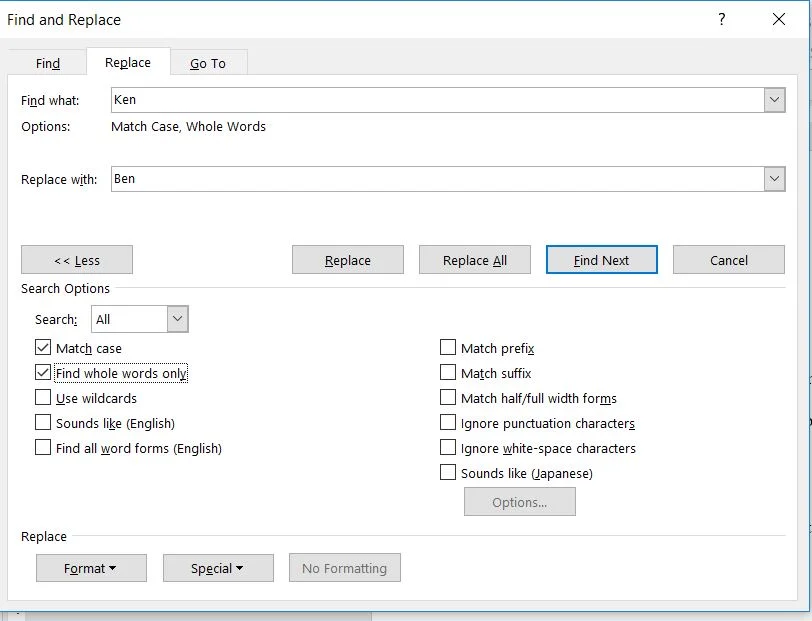
Let’s say you’re changing a character’s name from “Ken” to “Ben.” You can’t just replace all you might end up with Frankenstein words like “BroBen.” You don’t want that.
In this instance you’d click the “More” button. Check “Match case” and “Find whole words only.” With these parameters in place it should be safe to click Replace All. You’ll want to do the same search replacing “Ken’s” with “Ben’s.”
To delete extra spaces, Find what: [click space bar twice]/ Replace with: [click space bar once]/ Replace all. For large documents, you may have to do this a few times in order to get places where you click the space bar more than twice.
Change Default Font Settings (Calibri Begone)

One of the most annoying features of word is its default font. Nobody wants to write in 11 pt. Calibri. No one, I tell you! Luckily, this is pretty easy to fix.
Open a fresh Word document. Type “Template.” Under Home, click the font carrot. Set the font as 12 pt. Times New Roman or desired, and check “set as default.” In the pop-up dialog box, click “all new documents saved under Normal template.” Under the Paragraph carrot, you can also set the spacing to double and indent the first line. Now you’re cooking with manuscript format! Save the file as “Template.”
On Mac: Format/ Font. In the dialog box, click Font to get to your font choices. Click “Default.” To change line spacing, go to Format/ Document/ Layout, make your changes, and click “Default.”
When you save the document, Word might freak out and say, “Wait a second. Are you telling me you want all new documents to be 12 pt. TNR double spaced?”
And you will say, “Yes, Word. That’s all I’ve ever wanted.”
It’s not retroactive, so old documents will still have Calibri as default. However, you can change this in the same way for that individual document.
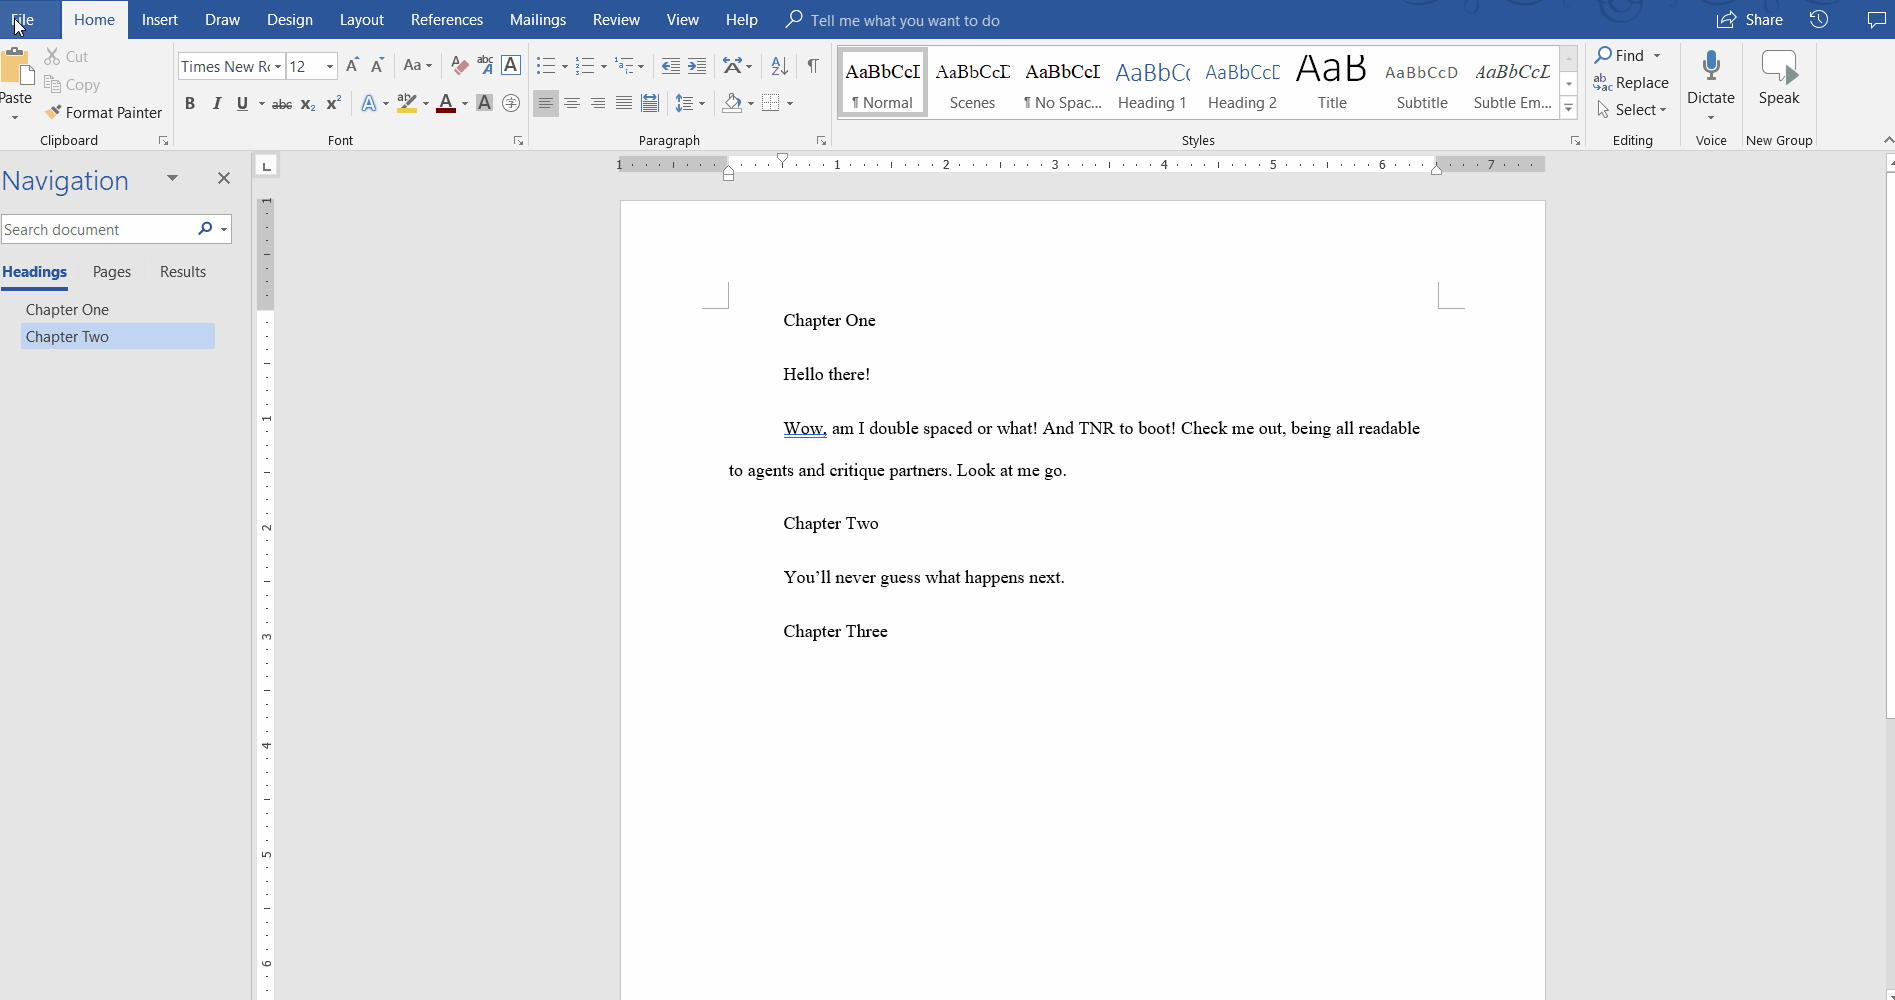
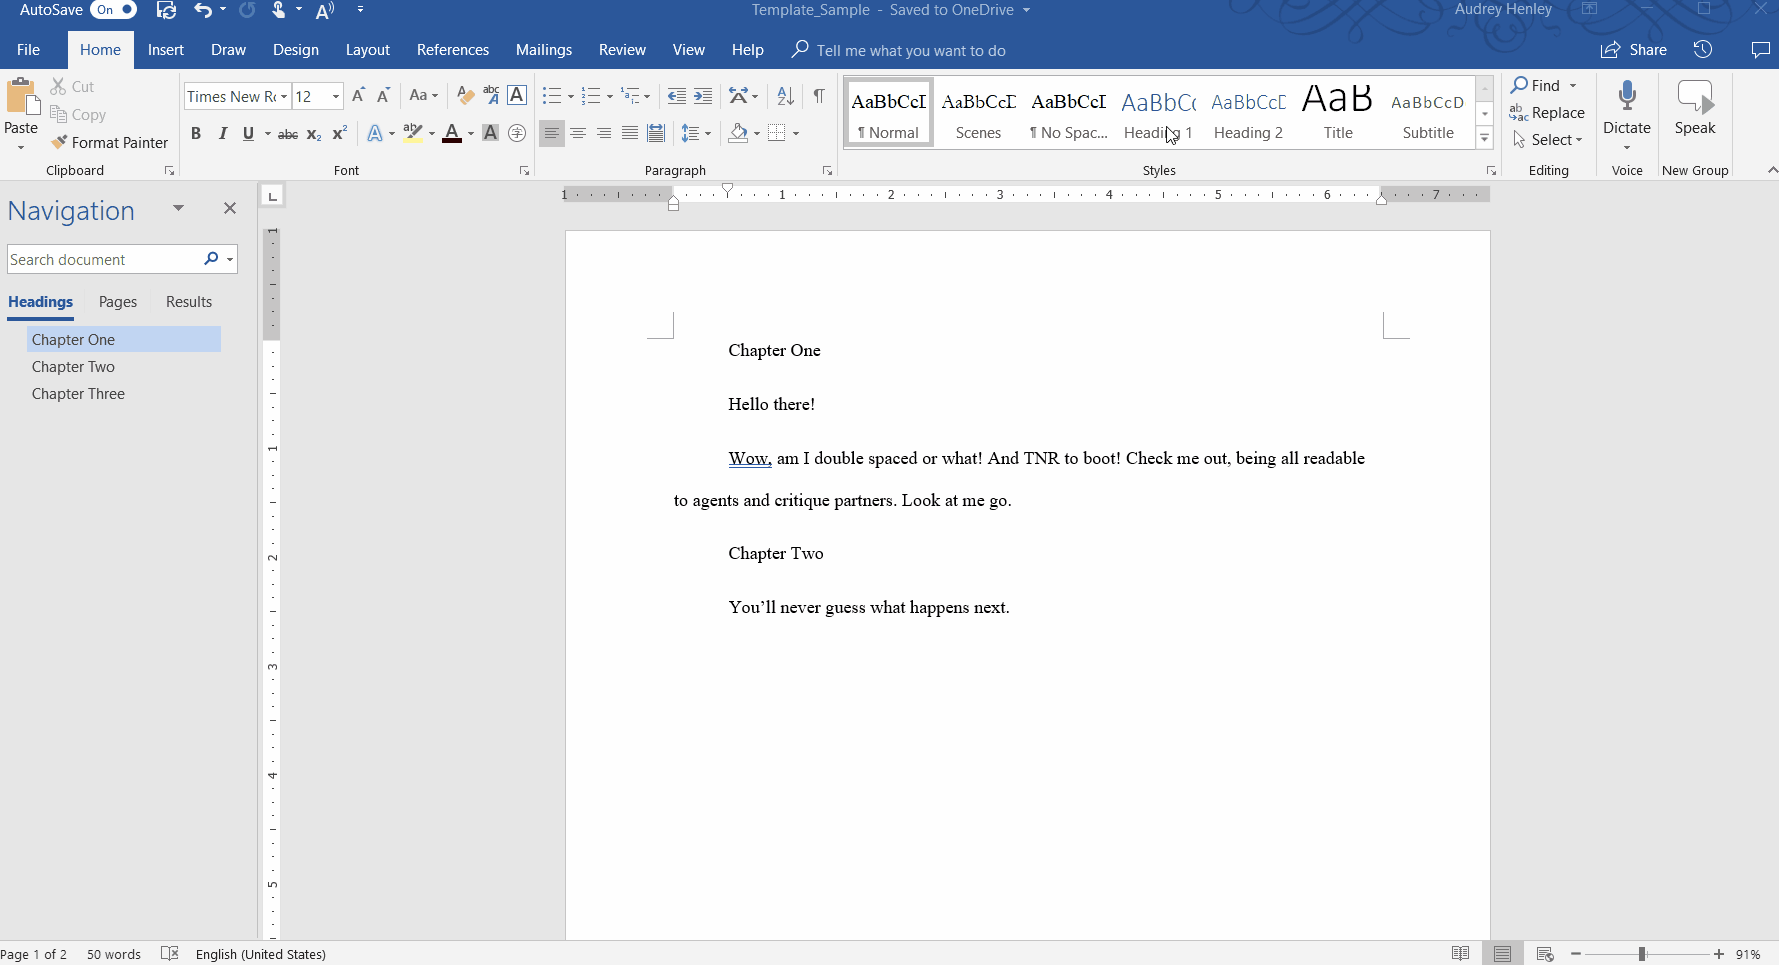
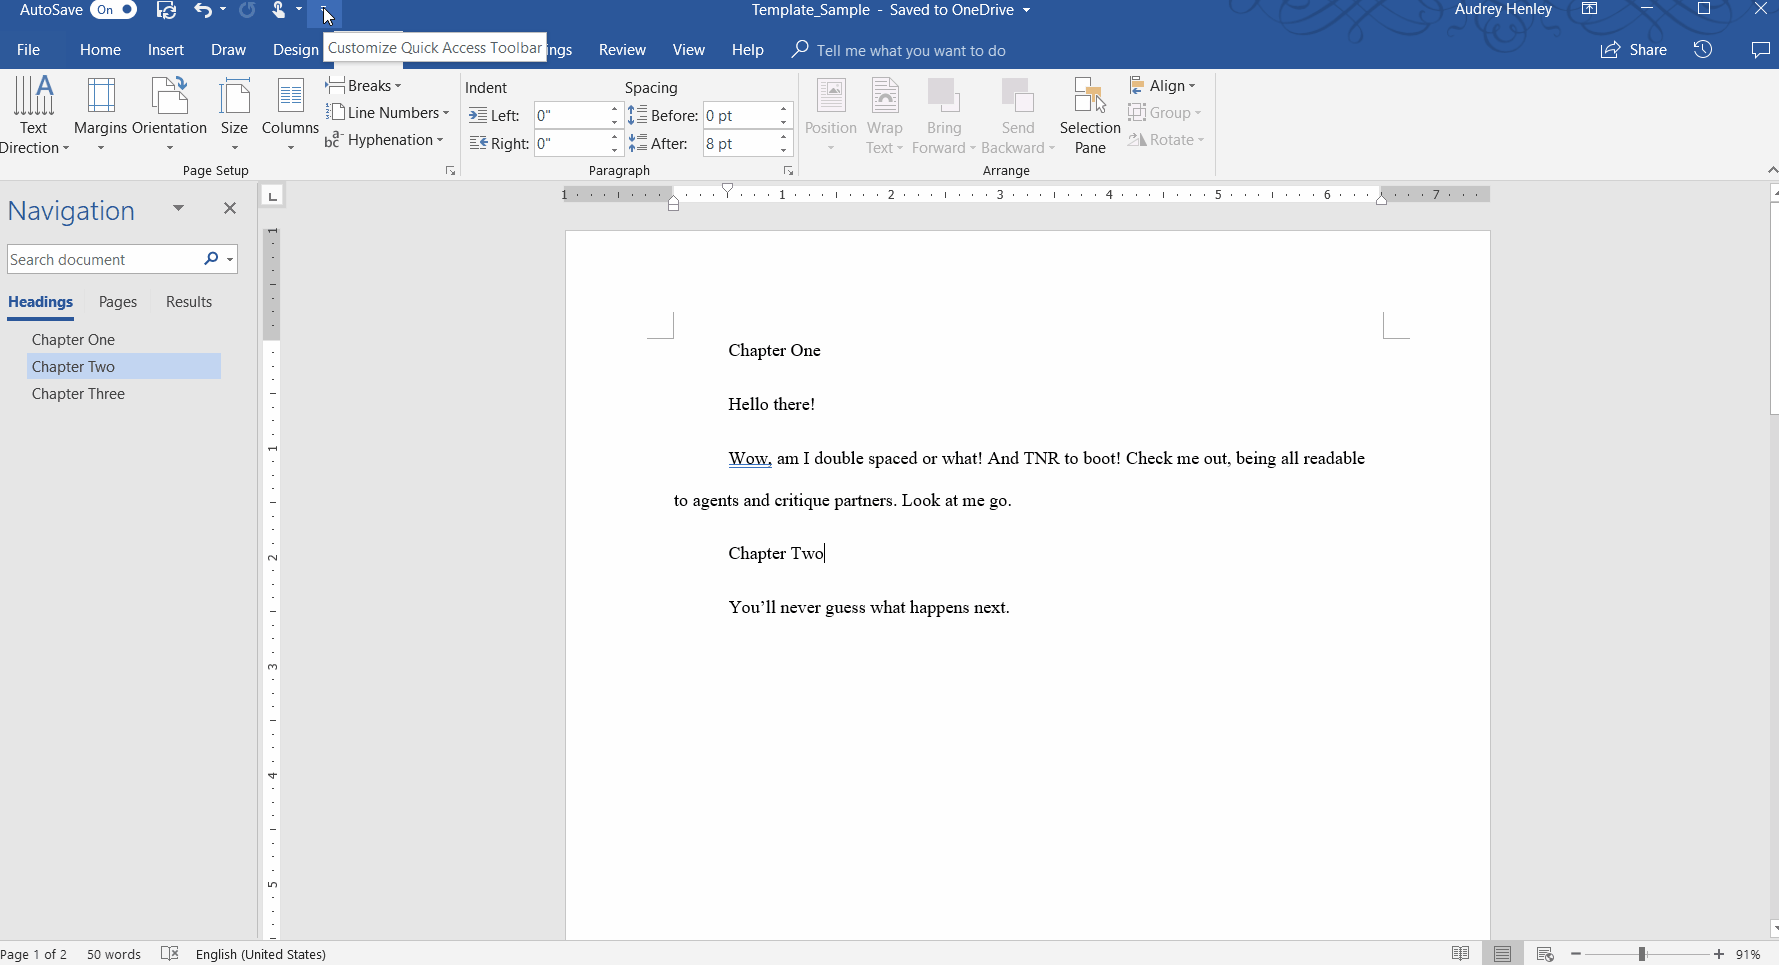
Use the Navigation Pane and Outline Levels
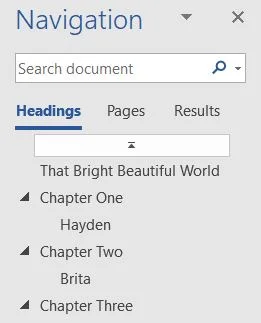
This is the number one thing that allows me to use Word instead of Scrivener. By formatting a document correctly, you can create a nifty outline that allows you to quickly navigate your document without having to control+ F all over the place.
To start, let’s get all your chapter titles as a “Level 1.” Highlight a chapter title and right click. Click Paragraph. Under Indents and Spacing, change your outline level to “Level 1.” It doesn’t change the look of your text at all, but it does add that text to your outline. Go to the Home tab. Click find, which will pull up the Navigation panel. Click Headings. Your chapter title should pop up in a pre-made outline. Do this with the rest of your chapter titles and you have an outline.
On Mac: To see the navigation pane, click View/ Sidebar/ Document Map Pane. I’m not quite sure how to edit outline levels on Word for Mac, so please comment if you know how.
I usually add chapter titles that I will delete later in the process before handing off to critique partners. It helps me remember where exactly each chapter is. I’ve also added “Act I,” “Act II,” “Midpoint” etc. later on in the process to help me with pacing and revision.
You can format other information, like time stamps or POV character, as “Heading 2.”
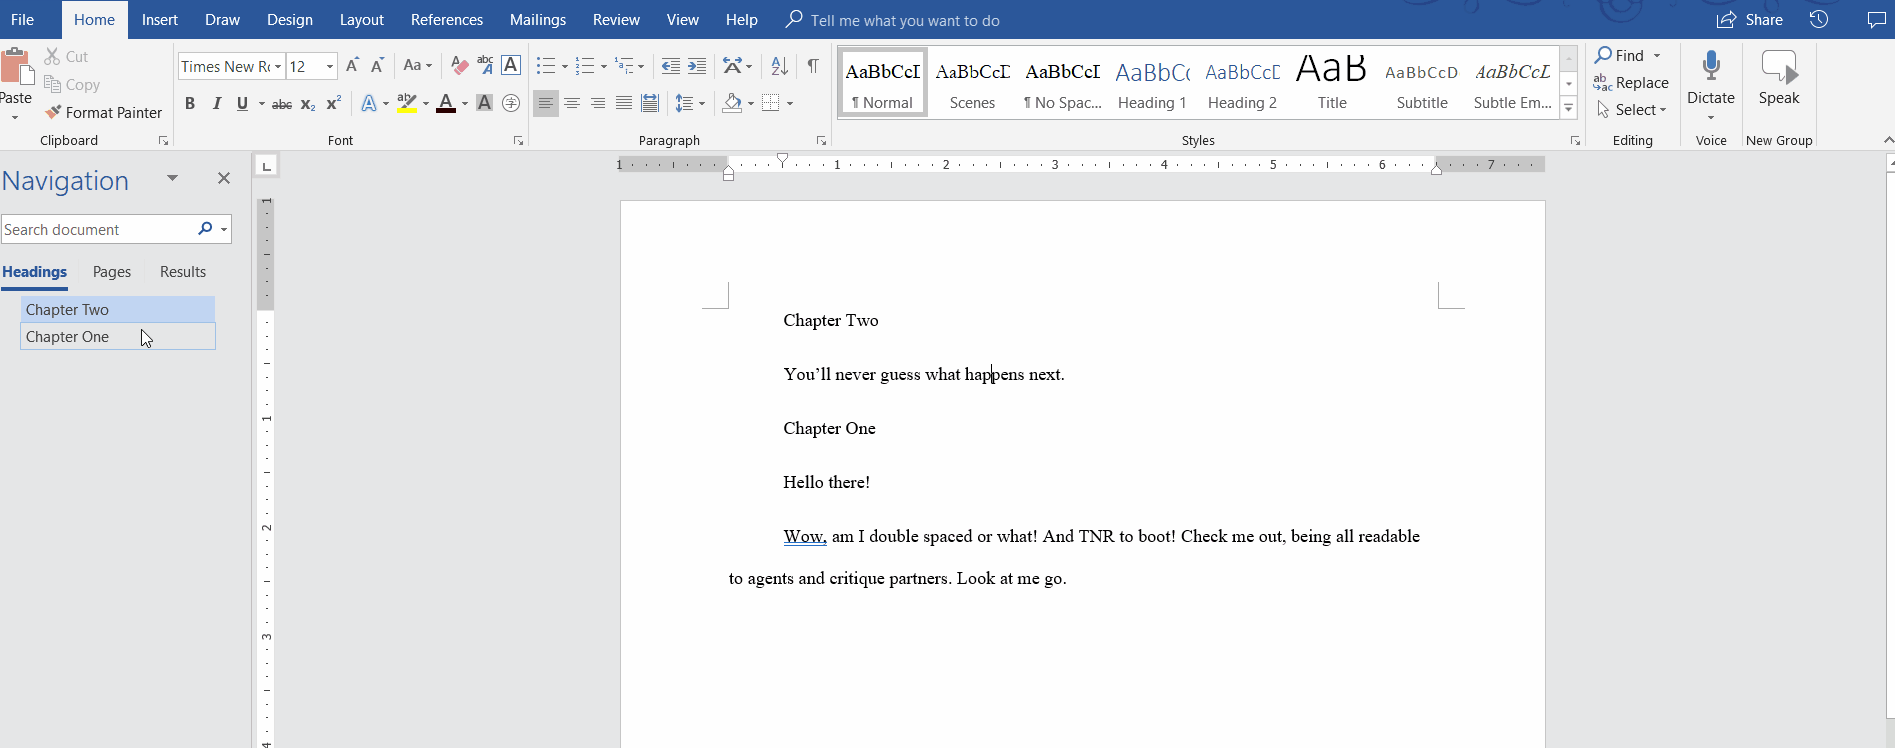
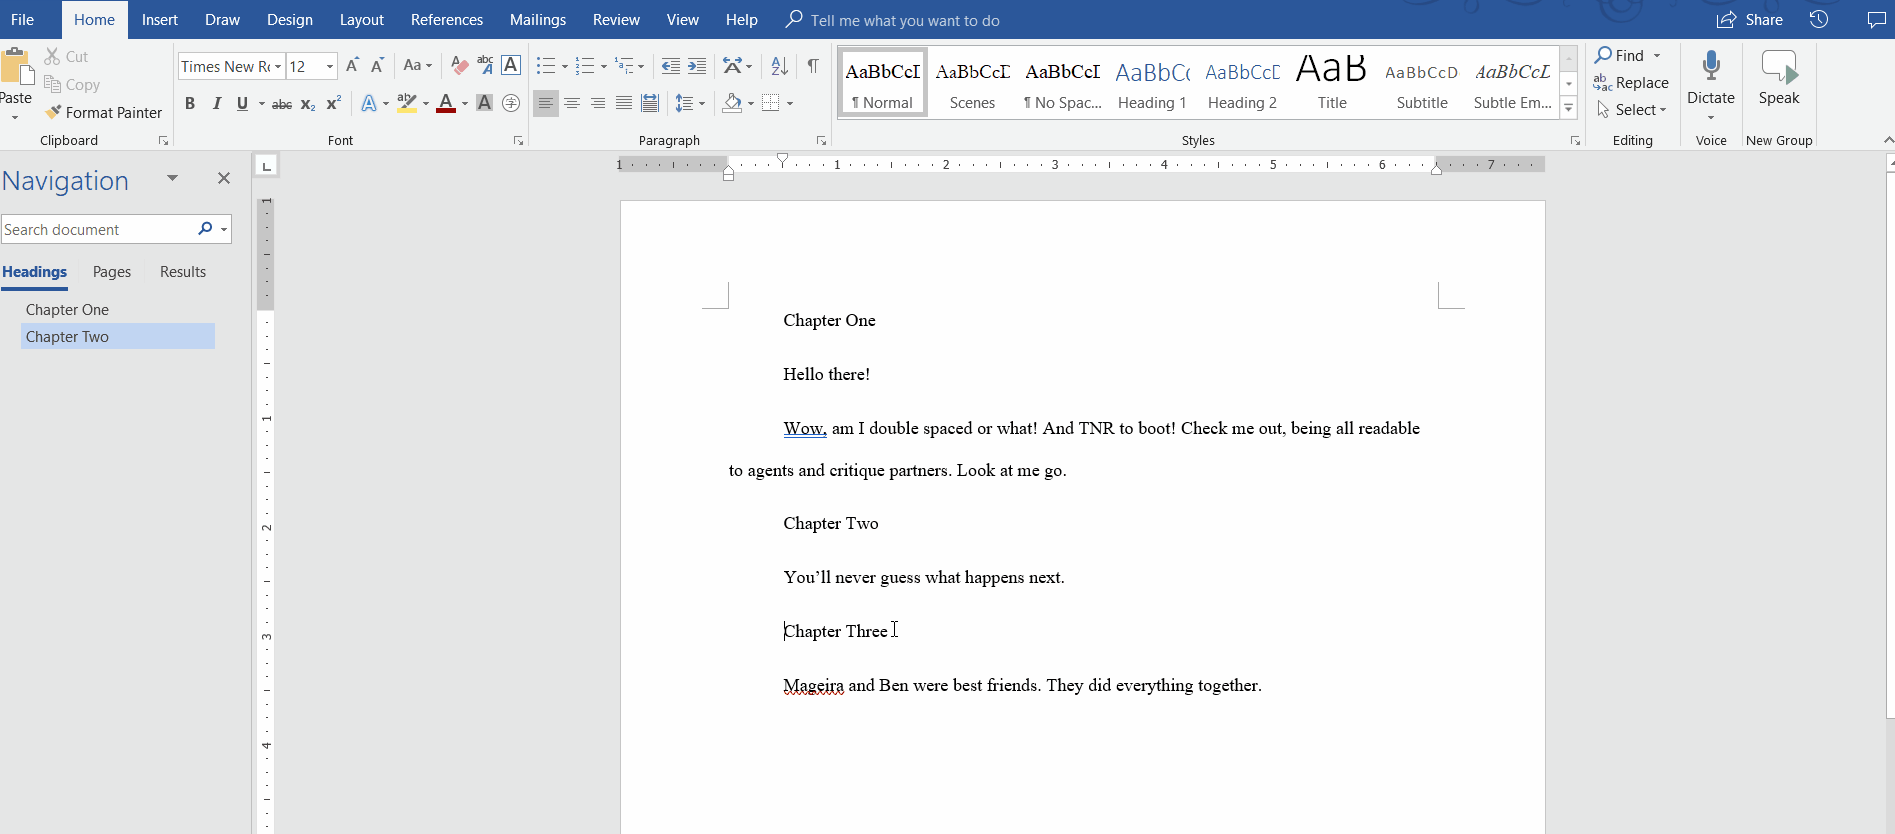
You can also move entire chapters easy peasy. Click and drag using the outline in the Navigation panel. You can also right click sections on the outline to “Select Heading and Content.” I use this all the time to check chapter word counts without having to highlight it all.
Styles
Styles are sort of an extension of the outline feature. Let’s say you want to do standard 12 pt. TNR for your primary text but want your chapter titles to be centered, size 16, and outline level 1. Create a standard paragraph style and a chapter title style to make your life easier.
I much prefer Garamond to TNR while typing. I knew that I’d have to change it to TNR before submitting anywhere, so I set my paragraph text as a style. This means that whenever I wanted to send my full to anyone, I could duplicate the main document and modify the styles to fit traditional manuscript guidelines.
You’ll notice on the Home tab there is a styles section. Click the carrot on the lower right, then select “Create a style.” You can also right click one of the built-in styles and modify it. It’s nice to be able to highlight a title and have it changed to the correct font size and automatically added to the Navigation outline.
On Mac: Similarly, you can see styles on the Home tab. Click Format/ Style to create new styles and modify existing ones.
Page Breaks at Ends of Chapters
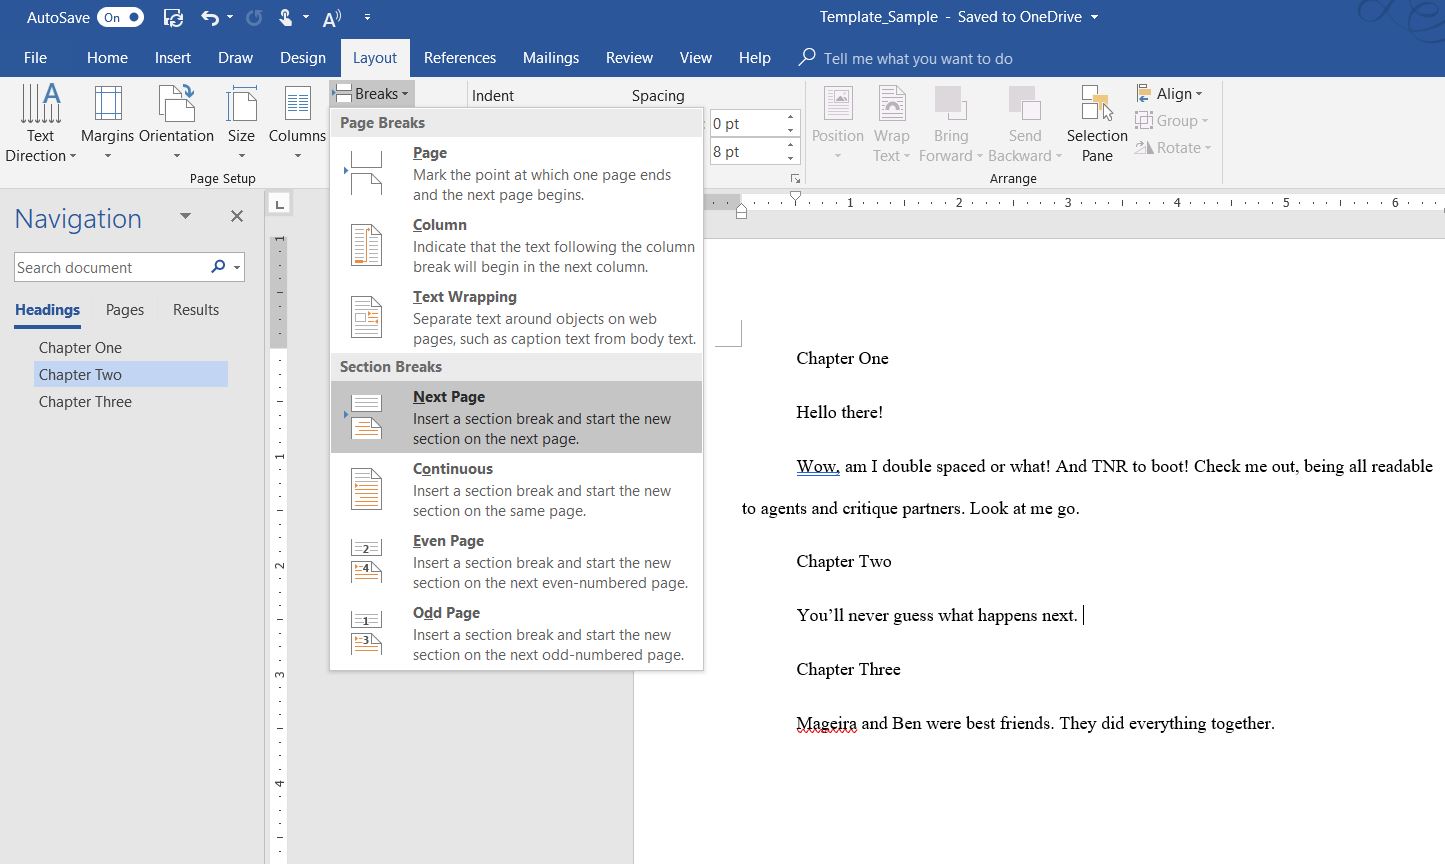
For the love of narwhals, please do not hit return to get a chapter to start on the next page. This will lead to frustration later as you have to keep adjusting these while you revise.
Instead, insert a page break at the end of the text of the previous chapter. To do this, head on over to the Layout tab, click “Breaks,” and choose “Next Page” from the dropdown menu.
On Mac: On Word for Mac, the page break dropdown menu lives in the Insert tab.
Get Word to Read to You
There’s a hidden feature built in Word to save your vocal chords when following the ubiquitous “read your words aloud” advice. On the very top ribbon, click the right-most carrot and choose “More Commands” from the drop-down menu. In the menu, scroll through the options on the left column and select “Read Aloud.” Click the “Add” button and then select “Okay.” The first time I did this, Word froze before working again. I’d suggest making this change while in a non-vital document.
On Mac: Macs have a built in Text-to-Speech feature. To turn this on, access Apple menu/System Preferences/ Accessibility/ Speech. There are various voice options, and you’ll set up a keyboard shortcut that will allow you to have your Mac read selected text to you.
Bonus: Check out How Long You’ve Worked on a Document
I’m not sure how to do this in Word for Mac, but in Windows click the File tab and you’ll see it on the properties on the right. It counts the time the document was open in editing mode. Unfortunately, this means that if you leave the document open for a day while doing other things, it will count that time. However, if you’re religious about closing your documents after a writing session, this can be an accurate measure of the time you’ve spent writing. I think it’s super gratifying to have that information.
Divide by 60, then 24. The number of days you’ve spent on a manuscript is always higher than you’d expect.
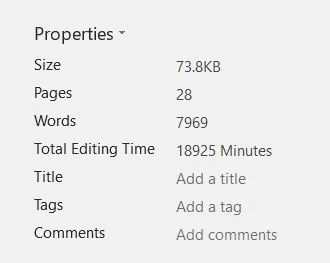
I’ve spent about 13 days working on blog posts for y’all. This is bloated from me leaving the document open all the time. . . but still. It feels good.
That’s all I’ve got! Let me know if you found this helpful or if you have any Word conundrums.